
Tsc Diagnostic Tool V1.64 Download |best| Page
Open the utility and select the corresponding interface. USB is the default setting. Retrieve Data:
Locate the dropdown menu at the top of the interface.
Organize and download fonts, bitmaps, and formats directly to the printer memory. 📥 Installation and Setup
The Terminal Services Diagnostic Tool (TSCDiag) is a built-in utility in older Windows operating systems (Windows Vista, Windows 7, Windows Server 2008, and 2008 R2). However, Microsoft later released updated standalone versions – including – to address bugs and improve logging capabilities. tsc diagnostic tool v1.64 download
This article is for informational purposes. Always ensure compliance with Microsoft licensing terms and organizational security policies when downloading and running diagnostic tools.
Once downloaded, double-click the executable file (typically named DiagTool.exe ) to launch the interface.
: It can diagnose hardware failures, resolve "red light" errors, and reset devices to factory defaults. Open the utility and select the corresponding interface
To download the TSC Diagnostic Tool V1.64, follow these steps:
tscdiag /html /log
The TSC Diagnostic Tool V1.64 offers several benefits to users of TSC printers. Some of the advantages of using this tool include: Organize and download fonts, bitmaps, and formats directly
It is worth noting that while the standalone v1.64 DiagTool is excellent for quick fixes, TSC has been promoting a more robust software suite called . Launched as a free feature-rich application, TSC Console integrates all the functions of the Diagnostic Tool, CommTool, and Printer Webpage settings into a single, centralized interface [15†L6-L19].
Remotely configure Ethernet settings, including IP address, subnet mask, and gateway. pos-shop.ru Usage Guide Connection: Connect the printer via Interface Selection:
Even if media is loaded, sometimes the sensor needs calibration. Use the "Calibrate" function within the tool.


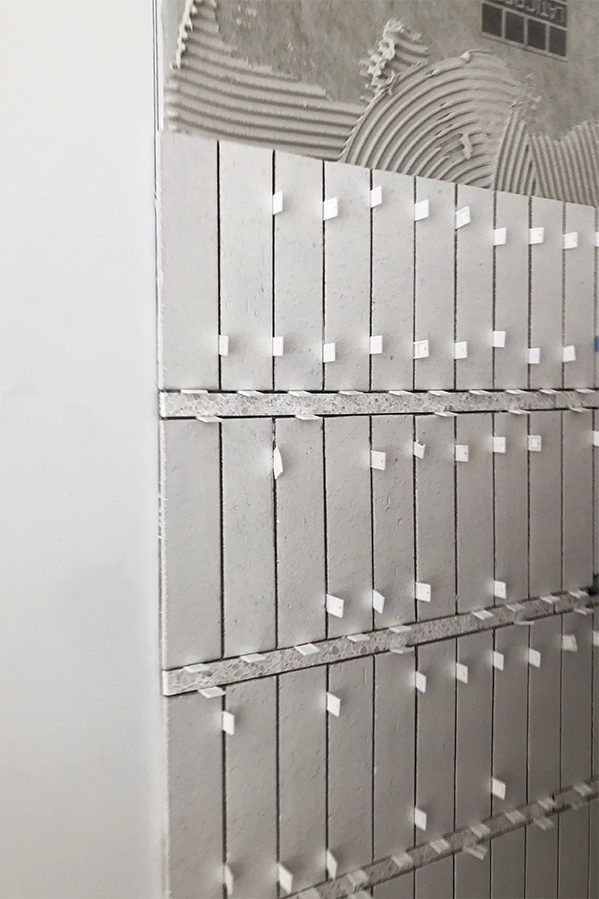
Never will there be a fancier temporary spacer than terrazzo- ha! It looks absolutely stunning.
haha right?!
I had been wondering how that thick grout line would hold up as most sanded grouts say max 1/2”! Thank you for sharing! It’s beautiful!!
Love it. I want to see your vanity! Also, are your terrazzo floors matte or glossy finish? X
I second this!! I actually came on here hoping we’d get a little morsel on the custom concrete vanity/sink. But perhaps she’s been giving it time just like this tile install before sharing.
Thank you for sharing! It turned out fabulous and I appreciate you wanting to make sure it held up well.
Hi sarah,
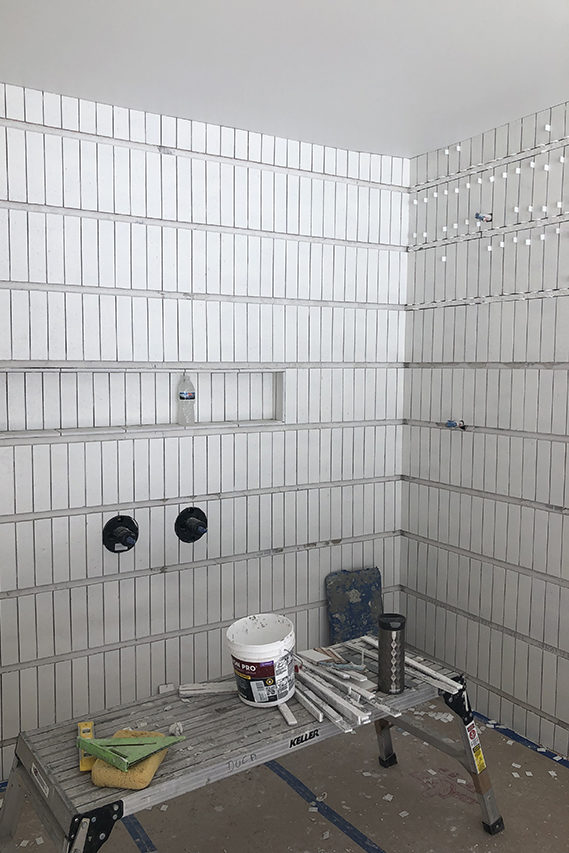
That tile is so beautiful! I want to do something similar in my shower but worried the thick grout will start to show cracks after awhile. Did you seal the grout in yours?
What mirror is that? I have been looking for a similar mirror? Is the mirror backlit?
Did you have to fill in the 1″ area of grout enough to cover the top and bottom of the tiles?
[…] matte white on the walls and the Natural Zellige on the floor. Read all about how we executed the wall tile treatment here. I designed the custom concrete vanity with an integrated sink and had it fabricated […]
I am curious if you could give any insight into how the application of the grout was done. How did you keep the one inch grout line looking smooth while also making sure to remove any grit haze from the tile? I would be afraid that as I wipe the grout off the tile face that I would mess up the finish of the thick grout line. I really want to try this but it makes me nervous!
Did you use a schluter tile edge strip where the tile transi to REGULAR wall?
Hi Gina!
No, Cle offered glazed trim tile so it looks like an edge so no need for a schluter.